Creating data sources
Learn how to create new data sources with vouch.
Overview
vouch data sources enable businesses to verify user-owned data without accessing or storing sensitive information. Users generate cryptographic attestations directly on their devices, preserving privacy while ensuring secure verification. This guide walks you through the process of verifying the header content from example.com using HTML proving.
Creating your first data source
First, navigate to the vouch catalog and select +Add a New Data source.
When creating a new data source, you'll encounter the following configuration sections: General Information, Messages, Config, Format, Inputs, Outputs, Inject Javascript, and Notarization. This guide will walk through each section step by step as we build a data source for example.com.
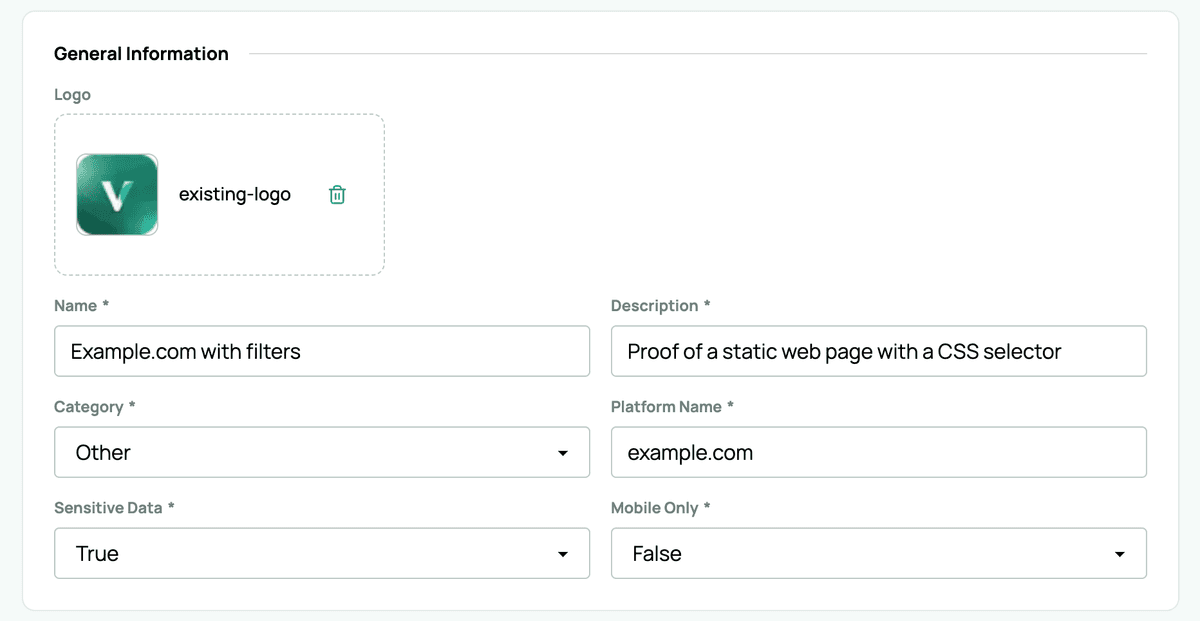
General Information
The General Information section is where you define the basic metadata for your data source, including its name, description, and category. Here's how it looks for our example.com data source:
Messages
The Messages section allows you to customize the user-facing text that appears during the proving process. This helps guide users through the verification workflow.

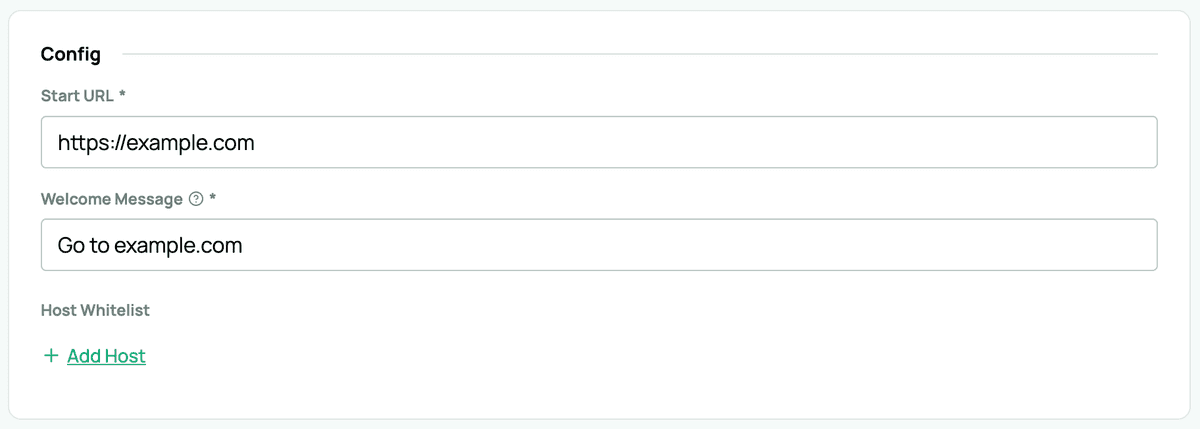
Config
The Config section defines the technical parameters for your data source. Here you'll specify the Start URL (the initial webpage to load), Welcome Message (shown to users before proving begins), and optionally a Host Whitelist (to restrict which domains can be accessed during the proving process):
Format
The Format field is optional and allows you to apply predefined data structures to your data source output. Available options include None, Example Format, Proof of Address, and Proof of Transaction.
Inputs
Inputs define any user-provided data required before the verification process can begin and have the following fields: Input Readable Name, Input Name, Input Description, and Input Validation. These might include account numbers, dates, or other identifying information. For our example.com data source, no user inputs are required since we're simply verifying publicly accessible content.
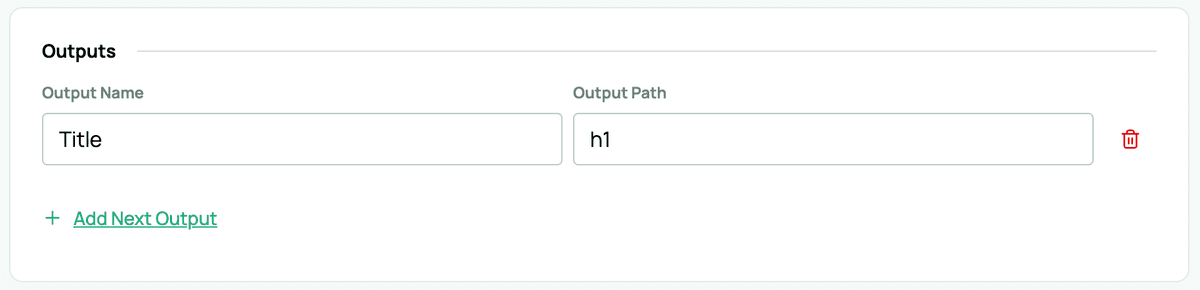
Outputs
Outputs specify which data should be extracted and verified from the target website. For our example, we'll extract and verify the header (H1 element) from example.com:
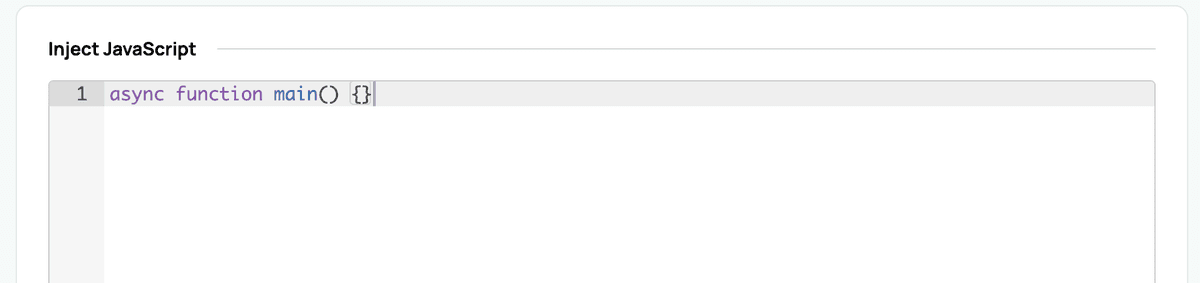
Inject Javascript
All data sources must include an asynchronous JavaScript function named main. This function controls the automation and interaction with the target website during the proving process.
The minimal required syntax is:
async function main() {}Within this function, you can programmatically control page navigation, trigger user interactions, handle redirects, fill forms, and perform other actions needed to reach the data you want to verify. For our simple example.com data source, an empty main() function is sufficient since no additional navigation or interaction is required:
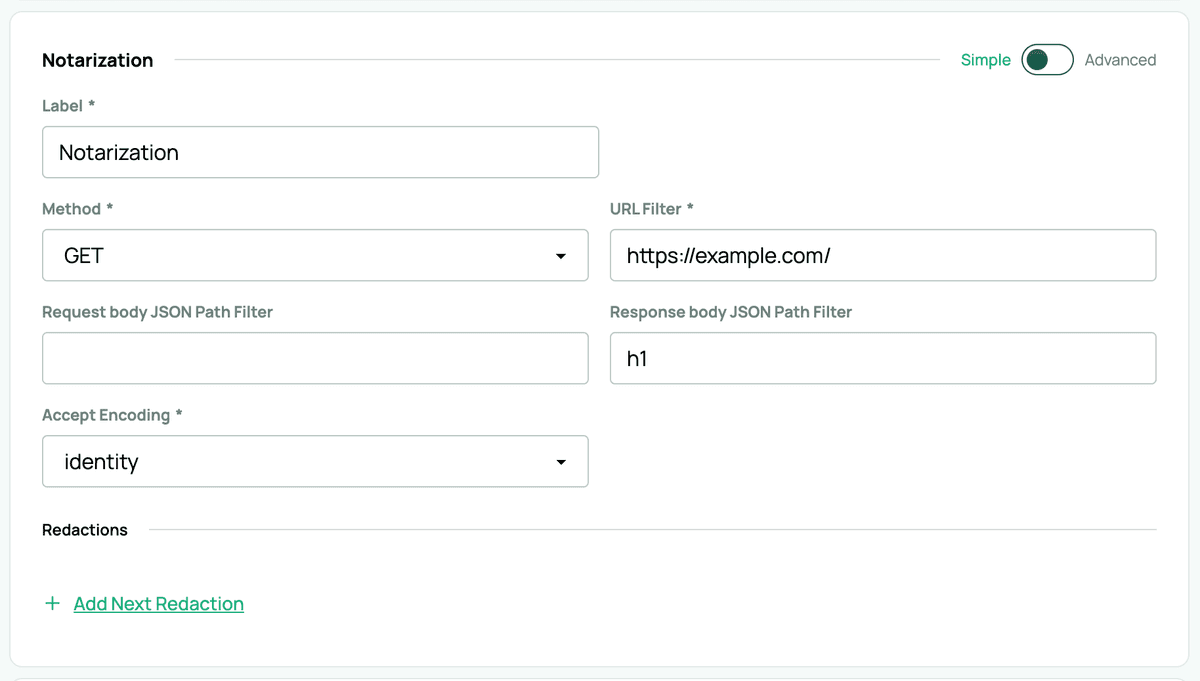
Notarization
The final step is to test your data source by running the notarization process. This verifies that your configuration correctly extracts and attests the specified data from the target website. The vouch Notarization fields are label, method, urlFilter, requestBodyJsonPathFilter, responseBodyJsonPathFilter, acceptEncoding, and redaction:
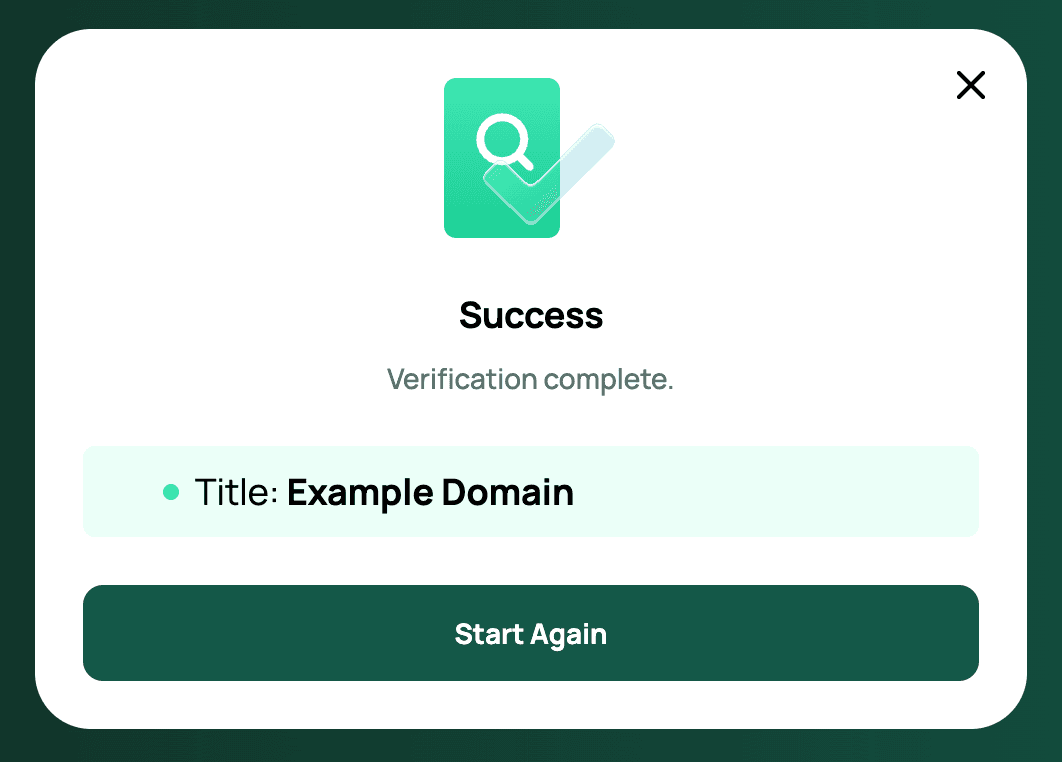
Upon successful notarization, you should see the extracted data. In this case, the H1 header element from example.com, displayed with confirmation that it has been cryptographically notarized:
Need to notarize multiple proofs at once?
Multiproofs let you execute multiple proofs in a single run by providing more than one urlFilter block. Each block is an independent proof spec; vouch batches them, fetches each target, applies redactions/filters, and returns a combined attestation.
Publishing your data source
When you create a data source in vouch, it begins in draft mode. Draft data sources can only be used by extensions that have developer permissions, and can only be tested and shared by developers logged into vouch. Draft data sources are usable only by the Chrome extension with Allow User Scripts permission enabled:

-
Draft
- Default state when a data source is first created.
- Usable only by users with developer permissions who are logged into vouch application.
- Not visible in the public catalog.
-
Publishing
- When you choose to publish, the data source enters the publishing state.
- This process can take time, since the vlayer Chrome Extension must be released for changes to take effect.
-
Published
- Once fully published, the data source is listed in the vouch catalog.
- At this stage, it can be used by everyone, not just developers.
Troubleshooting
Summary
You've successfully created a custom data source for vouch! This example demonstrated the fundamental workflow for building data sources:
- Define metadata in General Information to identify your data source
- Customize user messaging to guide users through the proving process
- Configure technical parameters including the start URL and optional security settings
- Specify outputs to determine which data will be extracted and verified
- Implement JavaScript automation to navigate and interact with the target website
- Test with notarization to ensure your data source works correctly
While this example used a simple public webpage, the same principles apply to more complex data sources that require user authentication, multi-step navigation, or specific data extraction logic. You can expand the main() function with custom JavaScript to handle virtually any web-based verification scenario while preserving user privacy through client-side cryptographic attestation.