First steps
Start a new Vouch verification
The fundamental pattern for initiating a Vouch verification involves using the Vouch SDK to generate a secure URL and redirect the user.
Using AI or LLMs with Vouch?
For better context add https://docs.getvouch.io/llms.txt to your LLM settings.
For AI agent tooling (Codex, Cursor, Claude, OpenCode), install Vouch skills:
npx skills add vlayer-xyz/vouch-skills --skill vouchInstall the Vouch SDK
Install the Vouch SDK using your preferred package manager:
npm install @getvouch/sdkyarn add @getvouch/sdkpnpm add @getvouch/sdkbun add @getvouch/sdkCreate Vouch instance
Initialize the Vouch SDK by creating a new instance with your customerId and apiKey:
import { Vouch } from "@getvouch/sdk";
const vouch = new Vouch({
  customerId: "1be03be8-5014-413c-835a-feddf4020da2",
  apiKey: "your-api-key",
});
Generate web verification URL with Vouch
Use the Vouch SDK to create a verification URL and redirect the user:
Constructor Parameters
customerId
Your unique customerId is provided during account setup. Contact the Vouch team to obtain your production customerId for live integrations.
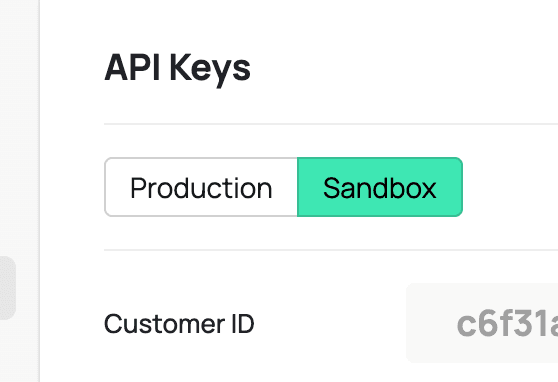
For testing purposes, you can copy your sandbox customerId from the Vouch dashboard under Organization → API Keys. It is advised to use this for development and testing before going live.
Production and sandbox are separate: each environment has its own customerId and API key. Proofs created with sandbox credentials are not billed, but they do not offer real cryptographic guarantees—responses may be placeholder or black-box example outputs intended for integration testing only.
apiKey
Your API key for authenticating with the Vouch API. This is sent as a Bearer token in the Authorization header when creating proof requests.
getDataSourceUrl Parameters
datasourceId
The UUID of the data source to use for this verification. Available data sources and their respective datasourceIds are listed in available data sources section and in the Vouch catalog.
redirectBackUrl
After the Web Verification is generated, the user will be redirected to this URL. This will usually be a page on your website where you can handle the response and display the result to the user.
The requestId is returned from getDataSourceUrl alongside the verificationUrl, so you can use it to identify the request when the user is redirected back.
requestId
An optional UUIDv4 that will be used as the proof request identifier. When provided, the server uses this value as the requestId instead of generating one. This is useful when you want to know the requestId before the request is created — for example, to build the redirectBackUrl with the requestId already embedded.
If omitted, the server generates a requestId automatically and returns it in the response.
webhookUrl
This is an optional parameter. If provided, Vouch will send a POST request to this URL with the generated Web Verification once the verification process is complete.
Make sure your webhook handler is capable of processing POST requests.
The requests will have a Content-Type of application/json, and the request body matches the webhook payload.
You must verify the webhook using your webhook secret and validate and process all outputs. See Verifying webproofs for the required steps.
inputs
The inputs parameter is a string that holds verification request parameters. Examples include a link to a tweet or a required minimum bank balance. Input values must be JSON-serializable types: string, number, boolean, null, arrays, or objects. Convert unsupported types (like bigint) to strings before serializing.
You must serialize your inputs as JSON and then encode the result as base64. The next section explains how to do this.
metadata
An optional free-form string (up to 256 characters) that you can attach to a proof request. Whatever you pass in is returned unchanged in the webhook payload, so you can use it to link a verification back to your own records.
Return Value
getDataSourceUrl returns a Promise that resolves to an object with:
verificationUrl: The URL to redirect the user to for starting the verification flow.requestId: The unique ID of the created proof request. This is either therequestIdyou provided, or one generated by the server if you didn't pass one.
Customize your appearance
You can customize the appearance of the proving flow (logo, colors, branding) for your organization in the Appearance settings.